


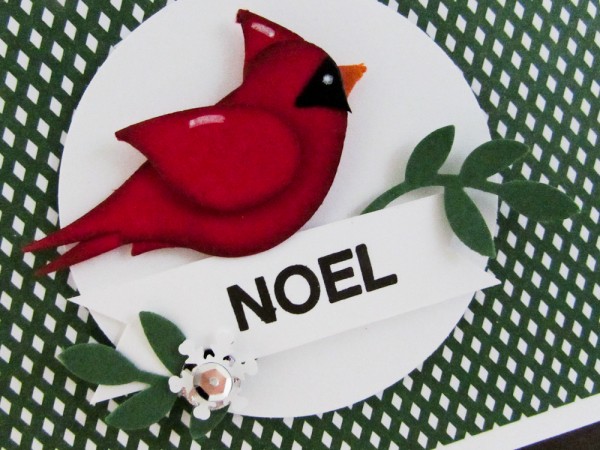
Today’s card was designed for my son’s AutumnFest Celebration and features a Stampin Up Punch Art Cardinal.
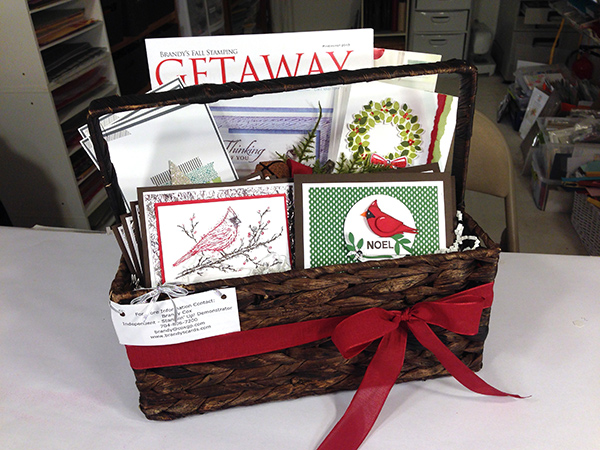
Our school mascot is the Cardinals! My Silent Auction Basket had four different cards for a total of 20 cards and envelopes. I was so proud to be able to make such a special gift and donate it to the school to raffle off for donations.
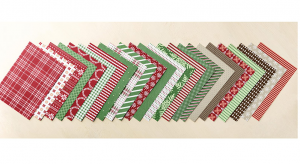
Do you recognize this fabulous paper? I think this is my most favorite designer paper this year. Its called Trim the Tree and its from the Holiday Catalog. Absolutely Gorgeous!
Punch Art Cardinal
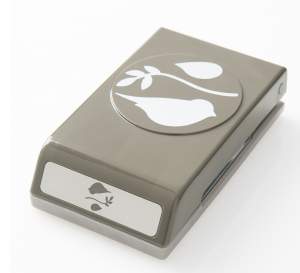
1. To get started prepare your pieces using the Stampin’ Up! Bird Builder Punch.
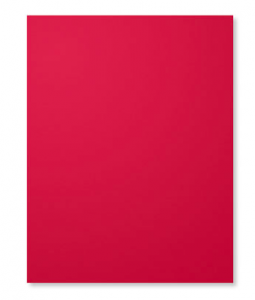
- 2 Real Red Birds
- 2 Real Red Wings
- 1 Basic Black Wing
- 1 Pumpkin Pie Wing
- 2 Garden Green Leafs
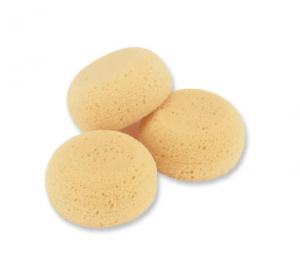
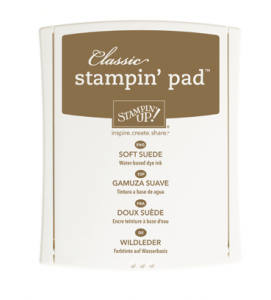
2. Using a sponge dauber or stamping sponge to pick up color from your Soft Suede stamp pad and flick around the edges of your Cardinal. You’ll want to do this for the 2 red birds and the 2 wings.
3. Layer one bird under the other. Your only using the second bird to create the tail feathers.
Tip: You might have to cut of some of the second bird so that it does show any where else. You only need the bottom bird for the tail feathers.
4. Use the wing to make his tuft. You’ll only be using the pointed portion of the wing as the tuft.
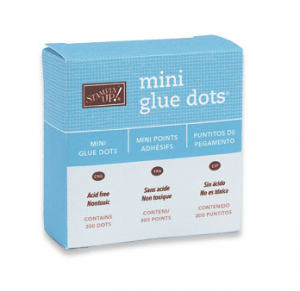
Tip: You might need to cut some of the wing so that it doesn’t show where you don’t want it to show. I find that using mini glue dots works well to add his tuft. Be sure you add the side that shows the soft suede. Otherwise, your Cardinals Tuft will be bright red and it will not match him.
 5. I used a mini glue dot to add the tip of the Basic Black wing to the Cardinals face. Flip your bird over and trim around of the remainder of the wing.
Tip: By using a mini glue dot and adding the wing… you can then use the bird to make the correct shape. Flip the bird over and trim around his face.6. I use the tip of the Pumpkin Pie wing for his beak.
Tip: Use a mini glue dot in the middle of the Pumpkin Pie wing and add it to your bird. You just want his beak peeking out. Trim the remainder if you need too.7. Use a Stampin’ Dimensional and pop up the second wing on top of your bird.
Tip: He’ll really come to life when you add the White Stampin’ Chalk Marker or the Uni-Ball Signo Gel Pen.
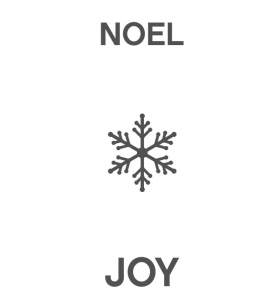
8. I stamped my sentiment in Early Espresso.
Tip: The NOEL is in the Stampin’ Up! Trendy Trims Stamp Set featured in the 2014 Holiday Catalog.
9. I layered my leaves around the sentiment and whisper white banner.
Tip: The Whisper White Banner is just scraps. I decided what greeting I was going to use and them found a piece of scrap paper that worked.
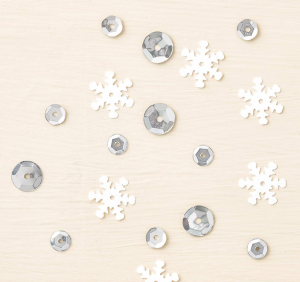
10. Lastly, I added a few accents from the Stampin’ Up! Frosted Sequins also featured in the 2014 Holiday Catalog.
Base
1. Cut a 5-1/2″ x 8–1/2″ piece of Early Espresso Cardstock and fold it in half. This is your base.
2. Cut a 5″ x 3-1/2″ piece of Whisper White Cardstock to layer on top of your base.
3. Cut a 4-1/2″ x 3″ piece of Designer Series Paper and layer it on top of your Whisper White Cardstock.
Tip: I used the Trim The Tree Designer Series Paper Stack featured in the Holiday 2o14 Catalog.
4. Using the 2-1/2″ Stampin’ Up! Circle Punch to punch out a Whisper White Circle.
Tip: I recommend popping the circle up by using Stampin’ Dimensionals. This will start to give you dimension.
Tip: Turn the punch upside, insert your paper and punch! Stampin’ Up! punches are fabulous!
Items Used Include:


Catalog Request Form
If you are interested in receiving a Stampin’ Up catalog, please fill out the request form below. If you currently have a demonstrator, please ask your current demonstrator for the catalog, because I do have to pay for the catalogs and for shipping. However, if you don’t have a demonstrator and are interested in purchasing Stampin' Up products, I’d love the opportunity to share Stampin’ Up with you, answer any questions and earn your business.


Really striking! Wish we had cardinals out west, never seen one for real.
Sooo cute, Brandy! What a creative use of the Bird-builder punch! I made a card, that been sitting on my table, waiting for an inspirational centerpiece – this was it! I put the cardinal motif in the center of that card and it was perfect! Thanks for the great ideas!
Your stamping friend in Albq. NM,
Kathi
Brandy, This card is gorgeous. I was so caught up in reading how you made this card and really liked the way you made the bird
3-D. I kept wondering where you were getting a pumpkin with wings. 🙂 then I realized you meant pumpkin paper. Ha ha. It’s nice to be able to make yourself laugh. This card makes a simple elegant statement. Thanks for always inspiring us.
That is a beautiful Cardinal! I love how you created it and your colour choice. Gorgeous Brandy!
I love the Cardinal card Brandy. I also love how you put your silent auction basket together. I hope who ever buys it loves stamping and they will get to go to Your Get Away. You always have such nice cards and I get so inspired by them all. I have the Bird punch, So, I am going to try to Card case this. Thanks for another great Idea.
Thank you for the great idea for this punch I have it but have not used it yet, (only 3 yrs) so will get it out and will start punching in some colours for options of using
Thank you
Pat
simple yet eye-catching.
What a darling idea….. I absolutely love punch and this is so creative… thank you so much for sharing the directions and your creattivity…
What a beautiful basket!
And I love you the Punch Art Cardinal! You are so creative.
Thank you for sharing.
Can’t wait to try this card. It’s so clever and so pretty. Thanks for sharing it.