

Wishing you and yours a Hoppy Easter!
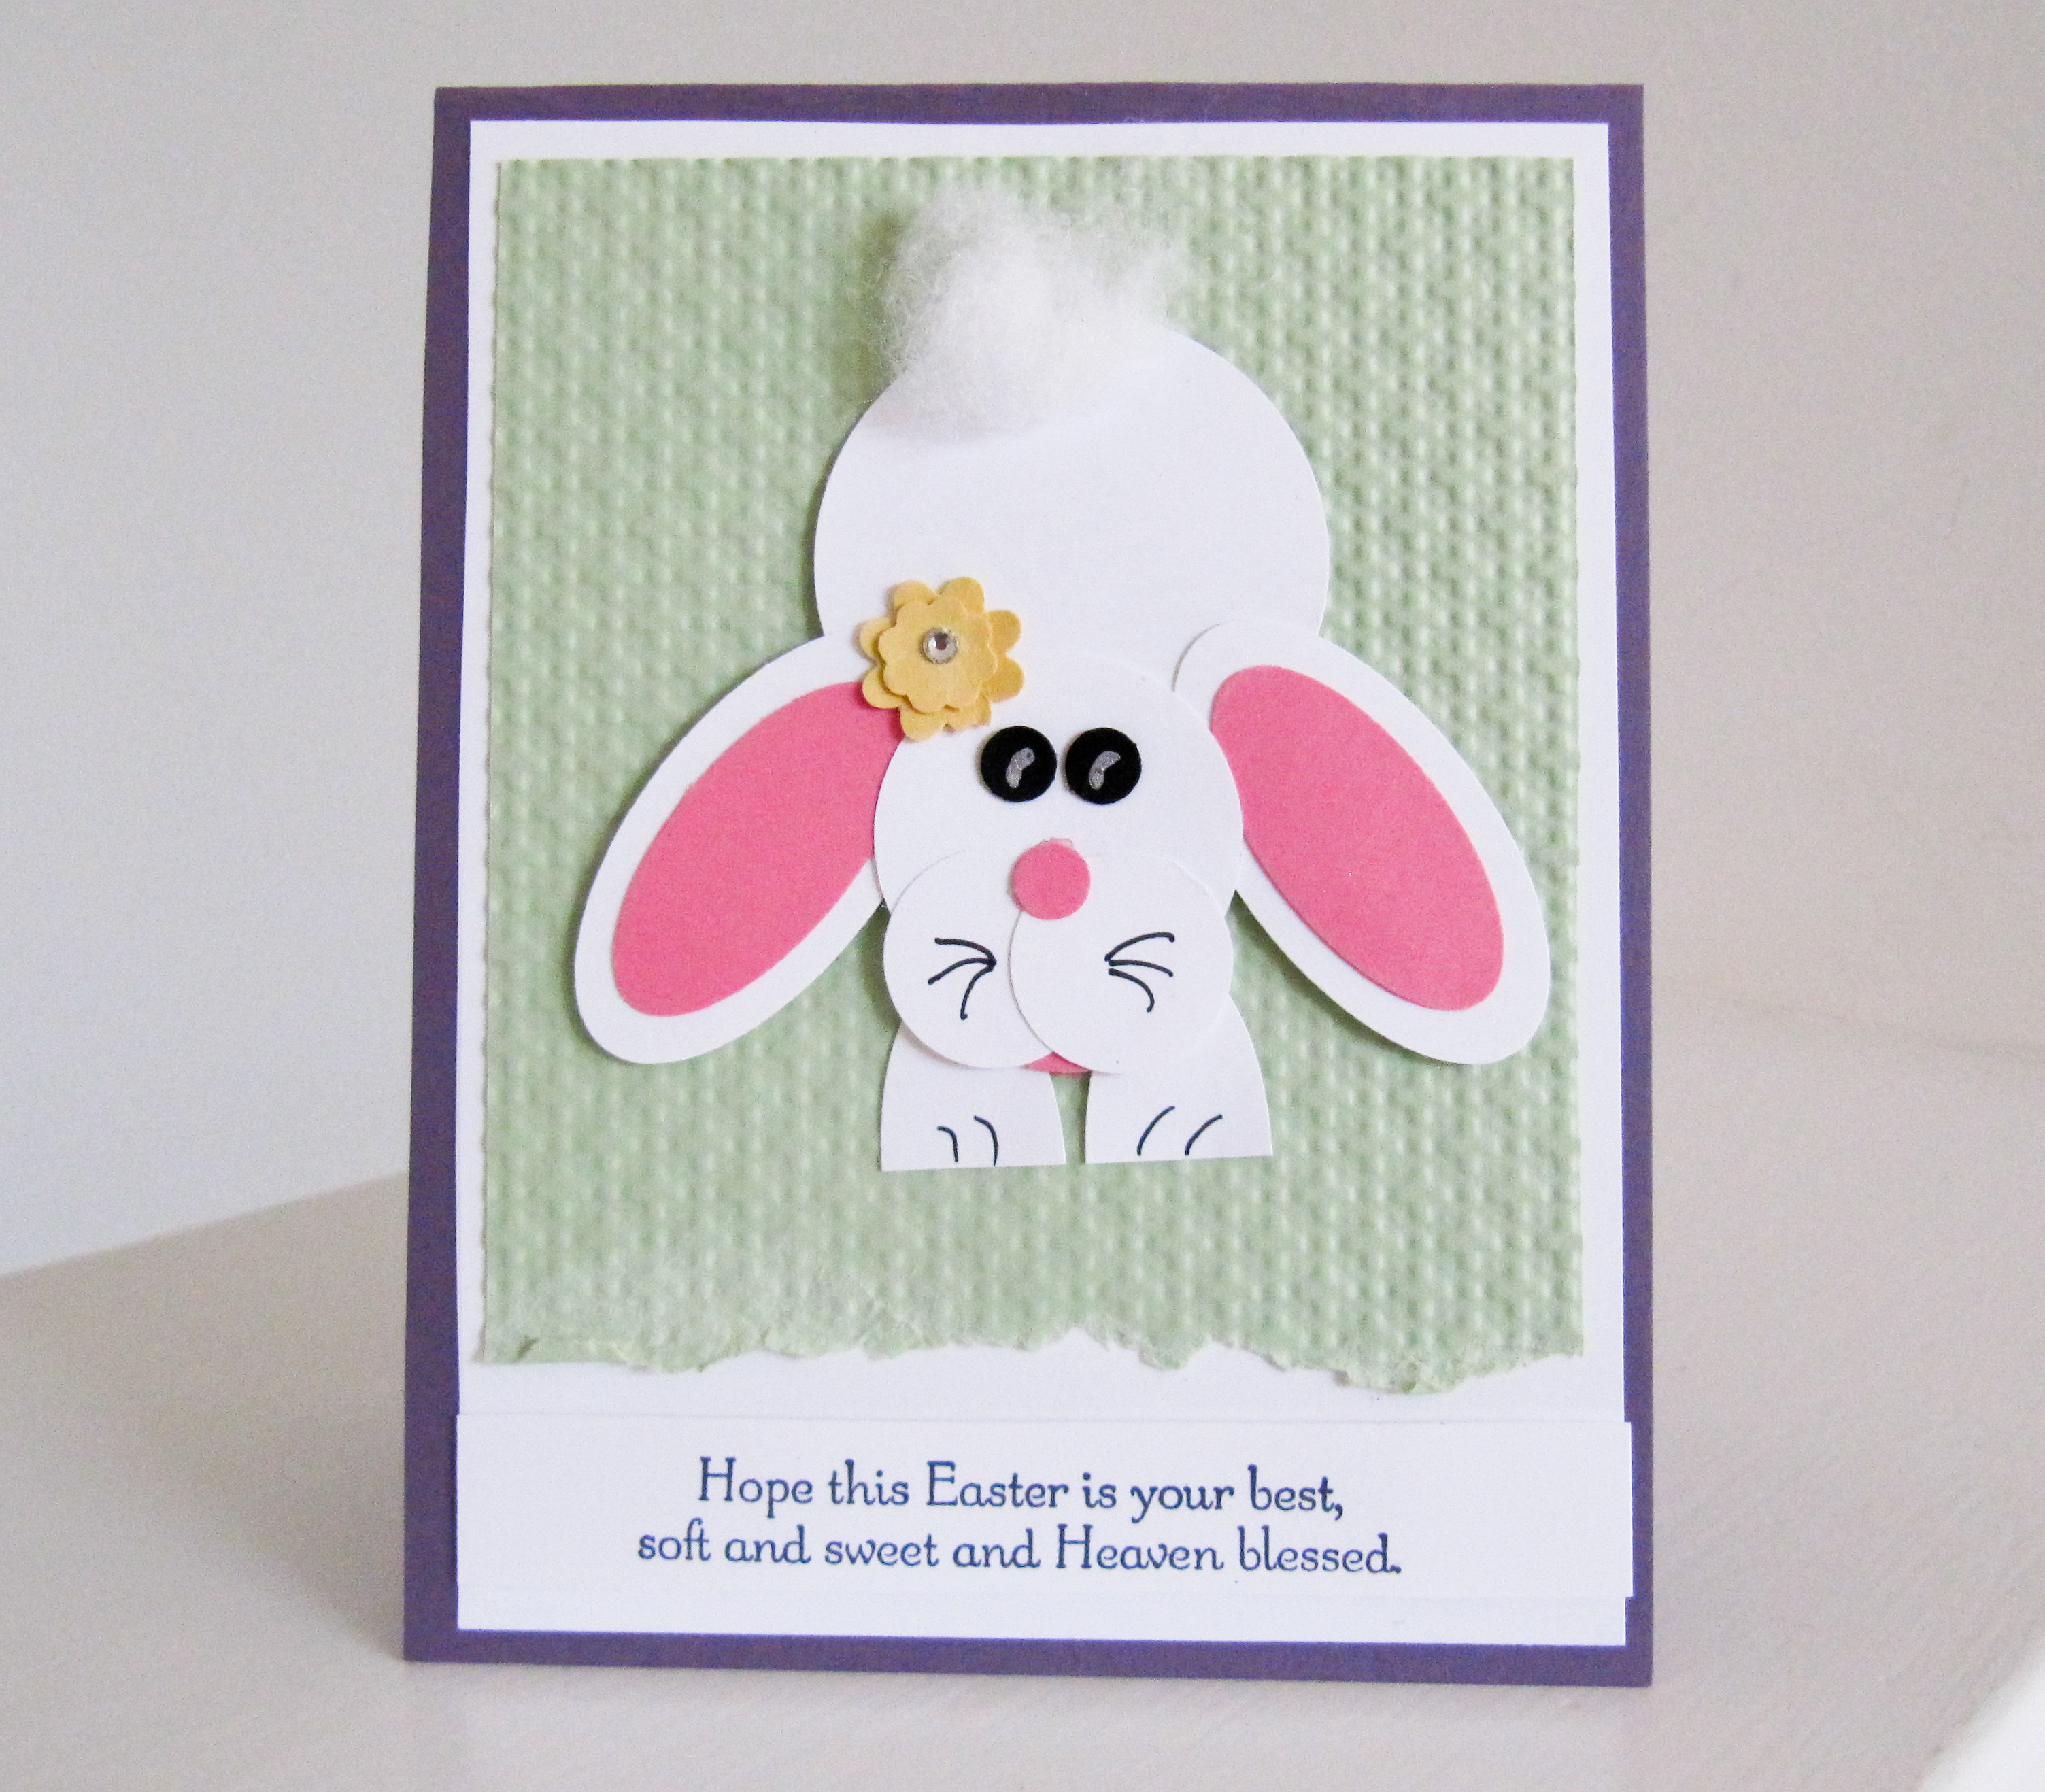
This fun punch art bunny is super easy to do and super cute with his cotton tail. I hope you give him a try!
Punch Art Bunny
- 1 3/4″ Circle (Base of his body) #119850
- Large Oval (White Ear) #119855
- Retired Small Oval (Inside Pink Ear)
- 1-1/4″ Circle (Head) #119861
- 3/4″ (2 for muzzle) #119873
- Itty Bitty Shapes Circle (Nose and Eyes) #118309
- Boho Blossomes and Itty Bitty Shapes (Flower) #119858
- Cotton Ball (Tail)

Directions for Base
1. Cut a 4-1/4″ x 11″ piece of Perfect Plum cardstock and fold in half. This is your base.
2. Cut (2) 4″ x 5-1/4″ pieces of Whisper White Card… (1) is for layering inside your card and the (1) is for layering on top of your card.
3. Cut a 4″ x 5-1/2″ piece of Pistachio Pudding Cardstock and tear it to size.
Tip: You want to cut your Pistachio Pudding cardstock a bit long so that you can size it on your card and hand tear it. If its too short… you will not enjoy the tearing process.
4. Using your Big Shot and Embossing folder of choice to add texture to the Pistachio Pudding cardstock and then adhere it to the front of your card.
5. Cut a 4″ x 3/4″ strip if you want to stamp a greeting to pop up. The greeting I used is from a retired Stampin Up Stamp Set called Heaven Blessed.
Build a Bunny
1. Approx. 1/2″ down from the top of the Pistachio Pudding cardstock you’ll want to pop up his 1-3/4″ Circle Body.
2. Glue the small ovals inside the large ovals. Put one pop dot on the bottom end of each ear. On the other end add a bit of liquid glue. A bit!
Tip: The side that you put glue on sticks to the body and the popped up end of the ear sticks to the Pistachio Pudding cardstock.
Tip: Happy Bunny vs. Sad Bunny… if you don’t fan his ears out he may look a bit sad. Keep that in mind when selecting placement for his ears.
3. Add pop dots to the back of the 1-1/4″ circle for his head and center between ears and a bit over the body. I didn’t like any of my Pistachio Pudding cardstock showing in between his ears, head and body.
4. Cut a Small white oval in half and glue to Pistachio Pudding cardstock. This is his feet.
5. Glue just a bit of two 3/4″ circles together. This is your muzzle. I also glued a bit of pink under the circles so that it looked like a tongue and added a bit more color.
6. Add you eyes and nose.
Tip: I use tombow glue when adding little circles and things. I dot the glue on the card and then drop the circle on top. If you try to do it the other way you might have the circle stuck to you. Lol!
7. I couldn’t find my White Chalk Marker so I used a Silver Sharpie to add to his eyes.
8. I used a Basic Black Marker for this muzzle and feet.
9. The flower was punched out of Daffodil Delight Cardstock and I added a Jewel Rhinestone.
10. Lastly, I dotted a bit of Tombow Glue and adhered the cotton ball for his tail.
Other Items Used Include: Perfect Plum Cardstock, Whisper White Cardstock, Pistachio Pudding Cardstock, Strawberry Slush Cardstock, Basic Black Cardstock, Daffodil Delight Cardstock, Elegant Eggplant Stampin Marker, Silver Sharpie (Eyes), Basic Black Marker, Square Lattice Embossing Folder, tombow adhesive, stampin dimensionals, Stampin Up Heave Blessed Stamp Set (Retired)
Catalog Request Form
If you are interested in receiving a Stampin’ Up catalog, please fill out the request form below. If you currently have a demonstrator, please ask your current demonstrator for the catalog, because I do have to pay for the catalogs and for shipping. However, if you don’t have a demonstrator and are interested in purchasing Stampin' Up products, I’d love the opportunity to share Stampin’ Up with you, answer any questions and earn your business.


that is adorable… I have been making and watching your videos all week… thanks for putting them up… I did the braid card for easter…. love it… you have a great site. Happy Easter…
Cut little bunny. I will make a couple for my grandchildren. Thanks for sharing Brandy.
Brandy, love, love this cute bunny card. Can’t wait to start making them. Miss you in Michigan:)
Great card, Brandy. The bunny is sooooo cute. Will have to give him a try. Thanks for sharing. Have a Happy Easter.