

Hi everyone,
I hope you enjoy this project, it was really quick and easy as well as fun to make.
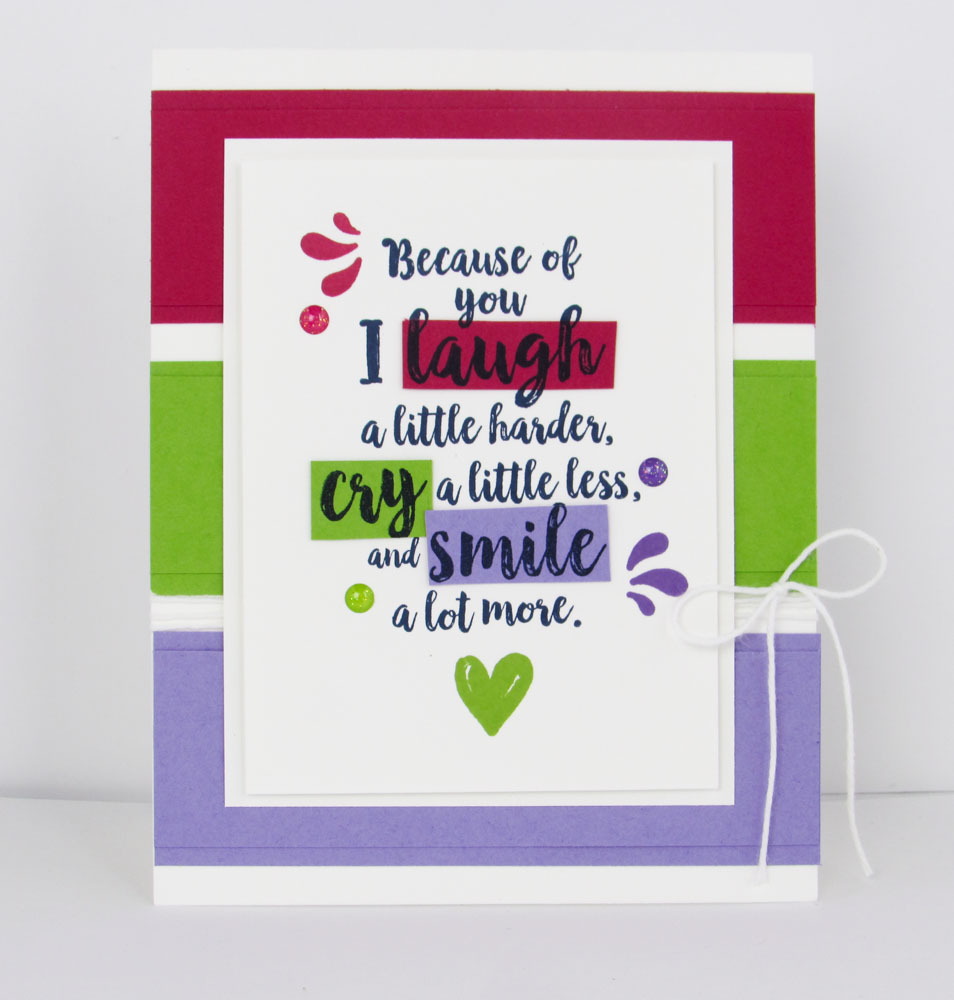
This card featured the Friendly Conversation Stamp set. This is from the 2018/2019 Annual Catalog.
If you have time, give it a try and let me know how it goes.
Be sure to check out all the sizes and dimensions below as well as download the Free PDF for you to keep.
Thanks so much!!
Brandy
Base
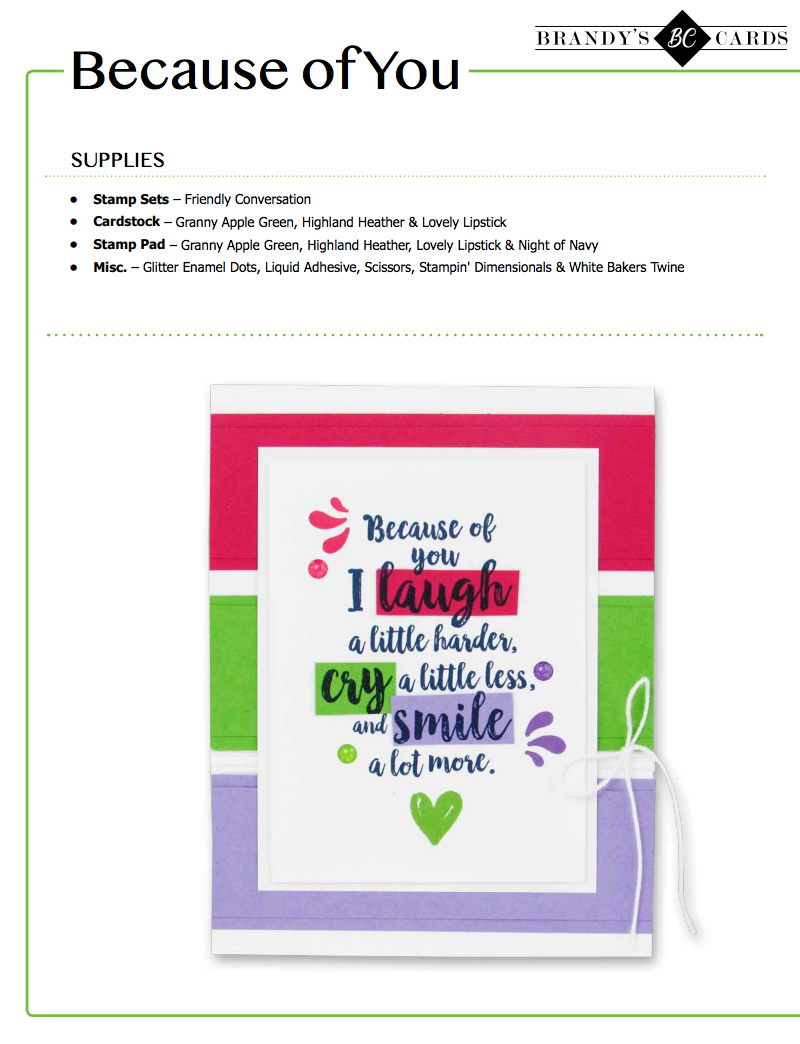
1. Cut a 4-1/4″ x 11″ piece of Whisper White Cardstock and fold it in half. This is your base.
2. Cut a 4-1/4″ x 1-1/2″ piece of Lovely Lipstick Cardstock.
3. Cut a 4-1/4″ x 1-1/4″ piece of Lovely Lipstick Cardstock. Center and adhere this pieces on top of your larger Lovely Lipstick Strip.
4. Cut a 4-1/4″ x 1-1/2″ piece of Granny Apple Green Cardstock.
5. Cut a 4-1/4″ x 1-1/4″ piece of Granny Apple Green Cardstock. Center and adhere this pieces on top of your larger Granny Apple Green Strip.
6. Cut a 4-1/4″ x 1-1/2″ piece of Highland Heather Cardstock.
7. Cut a 4-1/4″ x 1-1/4″ piece of Highland Heather Cardstock. Center and adhere this pieces on top of your larger Highland Heather Strip.
8. Next, lay out your strips so you can see the spacing.
Tip: The first strip should be about a 1/4″ from the top. Each white space will be approx. 1/4″ and there should be (4) total.
9. Once you’ve figured out your placing use liquid adhesive to add your strips.
10. To finish your base wrap white bakers twine around the card base between the Granny Apple Green and Highland Heather Cardstock and tie a decorative bow.
Sentiment
1. Cut a 4-1/4″ x 3-1/4″ piece of Whisper White Cardstock. This piece is to mat your sentiment.
2. Cut a 4″ x 3″ piece of Whisper White Cardstock. This piece is for your sentiment.
3. Stamp your sentiment using Night of Navy Ink.
4. Stamp your sentiment again on Lovely Lipstick, Granny Apple Green and Highland Heather Cardstock using Night of Navy Ink.
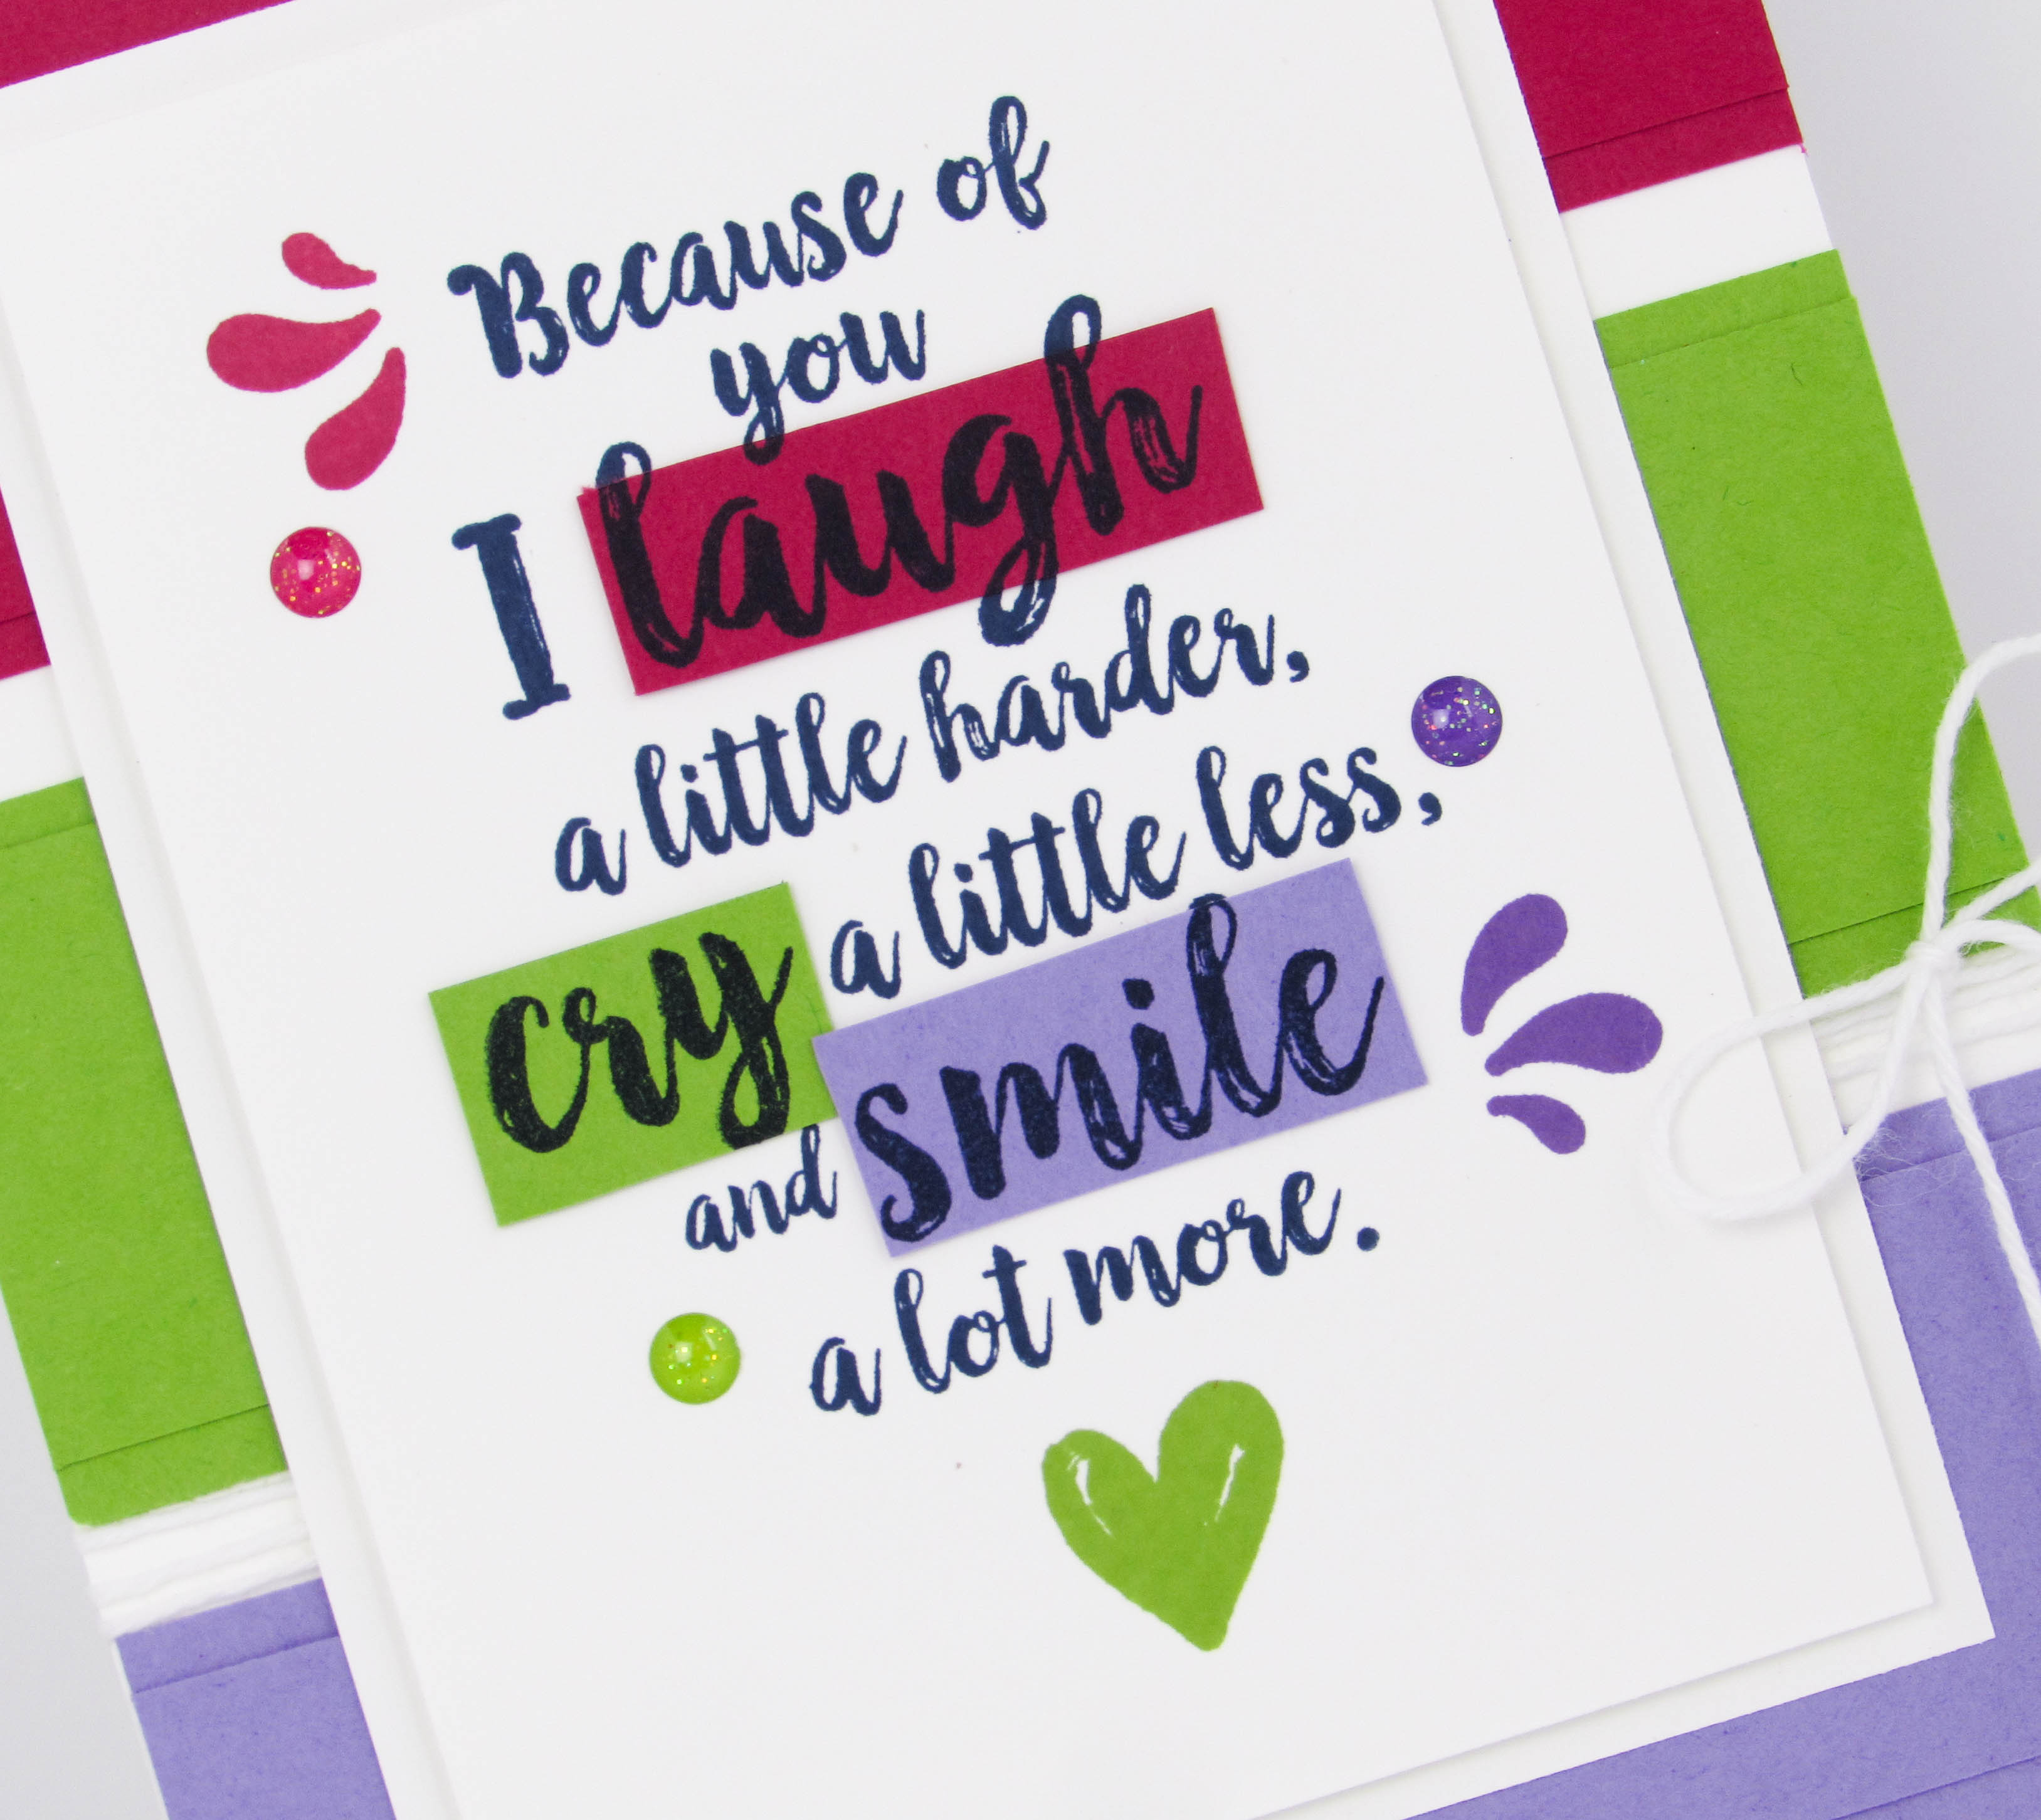
5. Carefully cut out the specific word from each color.
Tip: Laugh (Lovely Lipstick), Cry (Granny Apple Green), Smile (Highland Heather)
6. Match up the cut out words and adhere them to the stamped sentiment using liquid adhesive.
7. Next, stamp an accent in Lovely Lipstick at the top left of your sentiment and another in Highland Heather along the bottom right.
8. Center and stamp your heart under the sentiment using Granny Apple Green Ink.
Tip: Be sure to finish all your stamping before adding the mat behind your sentiment.
9. Use Stampin’ Dimensionals to adhere your sentiment on top of the matted piece.
10. Center and adhere your sentiment using liquid adhesive.
Finish your card with coordinating glitter enamel dots.


Hi Brandy! I love this card. The colors are so attractive and fresh. I watched it the day I received the video and ordered all the products to make it. My products arrived a few days ago and I plan to make it tomorrow. Thanks for all of your WONDERFUL ideas, you are an inspiration.
Sandy
Hi Brandy, I loved the new card making video. I went to look at my catalog & I have the 2017-2018 catalog. Could you send me the 2018-2019 catalog? I’m not sure if you have my address on file, it’s Karen Owens 2522 Lincoln Ave. Altadena, Ca 91001. Thank you & I can’t wait to see the new catalog!
I’m just wondering if I’m a registered member of your group. My friend, Cindy Luc, initially sent you my name, and you sent her two catalogs–one for her and one for me. But, is there something more I need to do to be registered with you.? Cindy recently received a Christmas catalog from you, and I wondered if I could get one too. I plan to order from you as soon as I can make up my mind—there are so many wonderful things to choose from!! Thank you for your help.
Linda Carrico
Thanks brandy, went up North, Really like this card , Missed you
Thank you Brandy for your great videos I’m learning a lot from them.
Just love the cards! Great idea. Thanks for sharing.
I love the sentiments on these stamps! My handwriting is not very attractive so when I find stamps that are saying what I want to say I am delighted! This tutorial is sooo inspirational!
LOVE the color blocking technique! It’s a great a way to use scraps too. Thanks Brandy
I enjoyed this video and the making of the card. It definitely will be a stamp set that I must order. Thank you for the tutorial directions and video.
Liked your color blocking technique. Pretty cool and think I will try that.
THANK YOU Brandy for the GREAT card ideas!
I love it! So cute!
very nice card thank you
Brandy – I absolutely adore these cards and your video is as always very enjoyable. Thanks for sharing.
Linda D.
Thank you for sharing Brandy , you just everything look so easy , lol
Hope to see you in Orlando,
Hugs Frenchie ??
Thank you for sharing your lovely cards, ???? Them all. Started Friendy conversation one ?? It. Thanks again. Bless you
Brandi…these are absolutely precious! I have been thru the catalog so many times and never noticed this stamp set…oh my! I love it! So many things you can do with it! TFS Loved your video!!
I love the cards you made. This is a great stamp set.
I wanted to tell you how much I love the stamp set you created when you reached a million dollars in sales.
The retired Pastor of our church was at our church fir 50 years. Although he is retired, he is still active in ministry for Christ. I used your stamp set to create invitations for his Golden Jubilee. I used the coordinating dies too. It was such a brilliant stroke of genius to create such a beautiful set. I will use it for many years to come.
God bless,
Tink
Love, love your videos! The cards are always lovely, and fun, filled with vibrant color palettes that I never would think of!
Thank you for taking the time to make the video!
I love your ideas!! You are right, the catalog has many great examples, but so do you!! Thanks so much for sharing.
Susan Ingersoll
Such a cute card, Brandy.
thank you for sharing these two projects with us crafters. They are very fun ways to jazzy up large sentiments. TFS :O) xx
Dear Brandy, What a great video. You always make watching your video fun and very interesting. I love to see your videos. I always learn something new. Thank you for this great video. Have a Blessed day. Ellen Hinds
Brandy, I can’t find where on your site to sign up for your blog via email. I used to be and it stopped. AAACK!
Hi Gail, You are signed back up. You are good to go!!
Thanks
Brandy
Where did you find your shamy that you used in your video?
Hi Dina,
We sell that shamy at Stampin Up! You can find it on page 206 of your annual catalog. Hope this helps:)
Thanks!!
Brandy
I just LOVE this card and the colors! Clean and simple and elegant. That is just my style. The bright colors are a little out of my comfort so pushing myself to think outside my box. Thank you so much for sharing!!
Wow – what a cute card. I love your “paper piercing” of the sentiment and what a cute sentiment too.