
Do you know how to use embossing paste? I’ll teach you how! Plus, I’ve provided tips, inspiration, and card ideas to get you started with this fun paper craft product.
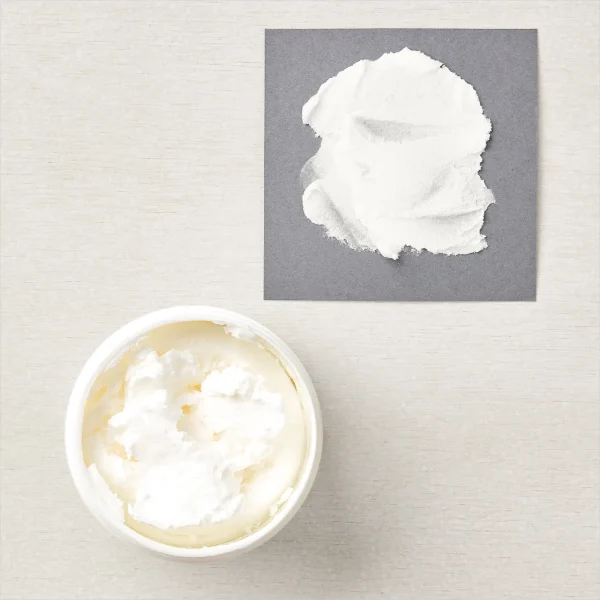
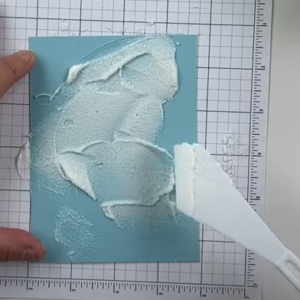
Embossing Paste is a spreadable and moldable paste that can be used in various ways to add texture to projects. It can be used with a template to create a decorative background or applied freehand as an accent. The paste can be heat-set or allowed to air dry.
Stampin’ Up! offers the embossing paste in 2 finishes, Matte and Shimmery White. The Matte offers a solid white finish, while the Shimmery White has some subtle sparkle.

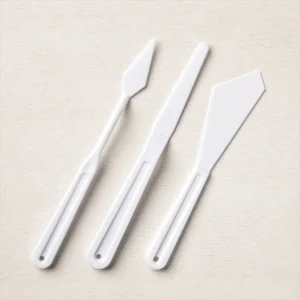
Palette Knives
Use Palette Knives to apply the paste. Each set comes with 3 knives: an offset trowel, an offset diamond trowel, and a scotty knife.
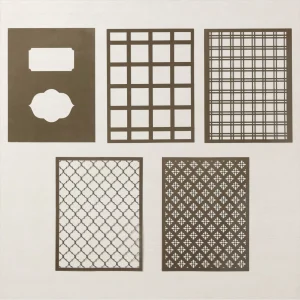
Decorative Masks
Use Decorative Masks to create textured backgrounds. The masks can also be used with other coloring tools. Be sure to check the current Stampin’ Up! Catalogs for available Decorative Masks.
Heat Tool
Use the Heat Tool to quickly dry the embossing paste. Keep it on the low setting, so the paste does not overheat or burn.
Silicone Craft Sheet
Use the Silicone Craft Sheet under projects to protect the work surface. This makes for easy clean-up.


Helpful Tip: Before beginning, have a bowl of warm, soapy water handy to clean the tools. Be sure to protect the work surface with the Silicone Craft Sheet or grid paper.
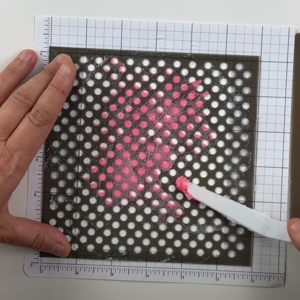
Textured Backgrounds Using Decorative Masks
- Place a Decorative Mask over the desired cardstock. This looks great on white or colored cardstock!!
- Secure the mask and cardstock in position using washi tape to hold the corners down.
- Use a palette knife to spread the embossing paste over the mask. For a whimsical design, consider applying only to a small portion of the cardstock.
- Scrape excess paste off of the mask using a palette knife.
- Gently lift the washi tape, and carefully remove the mask from the cardstock.
Tip: For even more designs, try layering the Decorative Masks to create new patterns.
Textured Backgrounds Without Decorative Masks
Don’t have any stencils or Decorative Masks? Use dies to create one!!

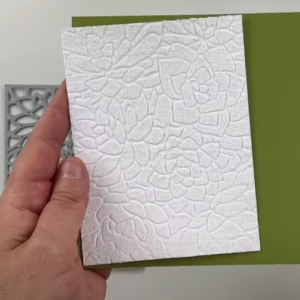
Potted Succulents Dies on white cardstock.

Potted Succulents Dies on colored cardstock.
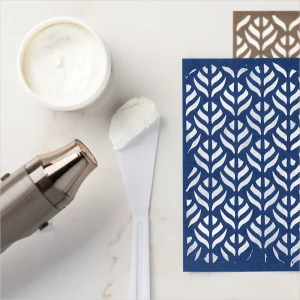
Change Embossing Paste Color
Use any color Classic Stampin’ Ink Refill to dye Embossing Paste, and to add color and texture to projects. Begin by placing a dollop of the Embossing Paste on the Silicone Craft Sheet. Using the desired color ink refill, add a couple of drops to the paste and mix with a palette knife. For a darker, more intense color, add more drops of ink to the paste.

Add a few drops of Ink Refill.

Stir the color.
Apply as normal.

Left with a beautiful background!
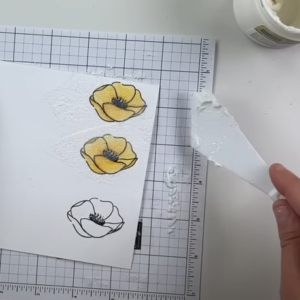
The Shimmery White Embossing Paste can also be used to add sparkle to an already stamped image.
Stamp the desired image on scrap cardstock and color using Stampin’ Blends. Once the colored image has dried, use a palette knife to apply a very thin layer of the Shimmery White paste over the image. Let it dry before cutting out and adding to the project.

Color Using Stampin’ Blends
After the paste has dried, use Stampin’ Blends to color the textured design.
Be gentle when coloring, as the textured embossing paste may cause the Stampin’ Blends to dull.
Brandy used this technique during the Creativate Summer 2021 Retreat. The tutorial for this project, along with the other Retreat projects, are available for purchase on the BrandysCards Retired Store.

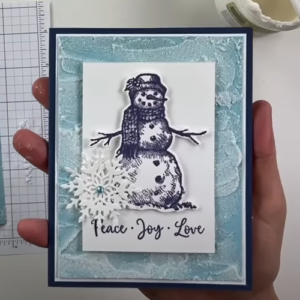
For an artistic approach, apply the embossing paste freehand. Try this technique with the Shimmery White Embossing Paste to create snowbanks for a “cool” wintery background.
The snowman pictured is from the Snow Wonder stamp set. This stamp set is now retired.

If you enjoyed this tutorial you’ll want to make sure you check out other how-to tutorials in my card making for beginners series.


Loved the demonstration. Didn’t know about the projects you showed us