
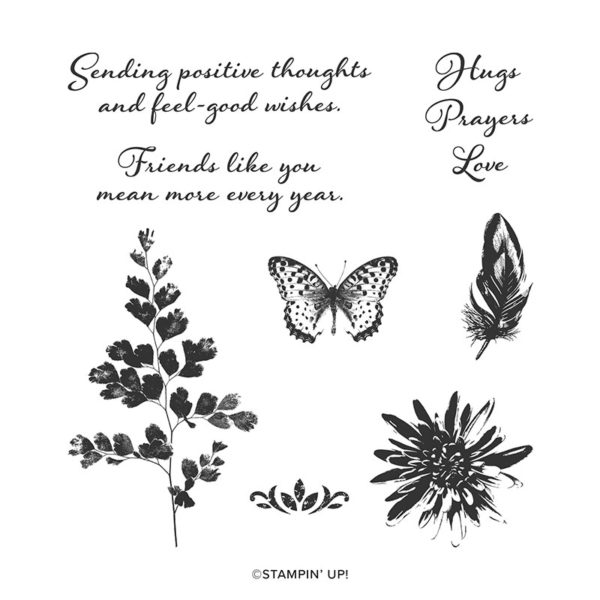
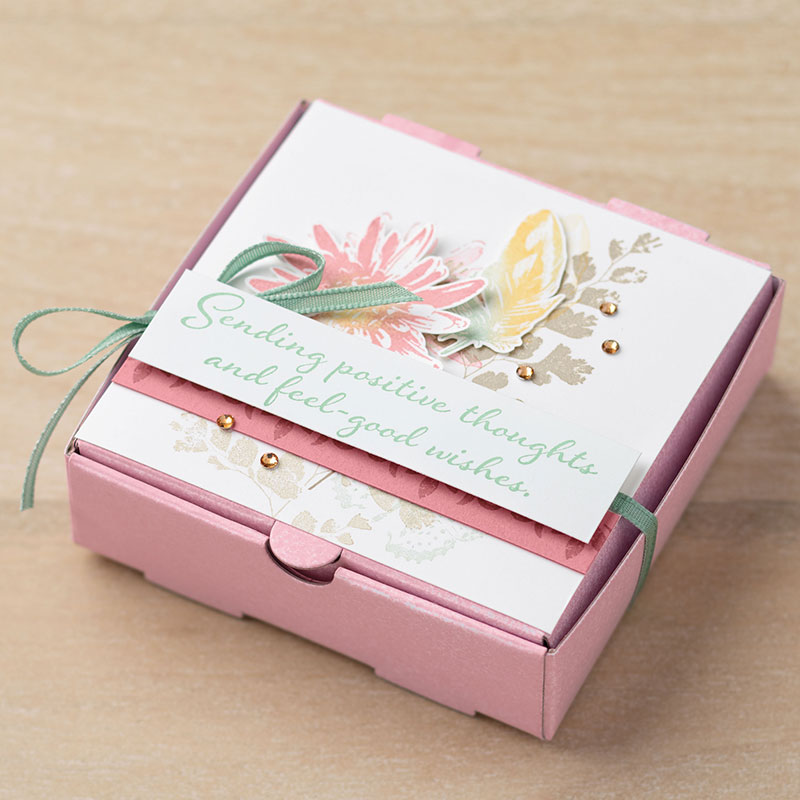
Today’s card was designed using the Stampin’ Up! Positive Thoughts Stamp Set. You can find this beauty in the Stampin’ Up! Spring Catalog Handmade For You.
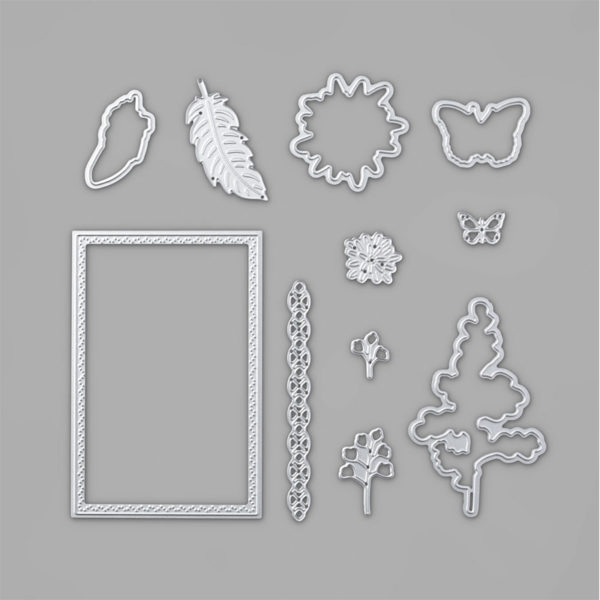
And good news, Stampin’ Up! recently launched the Nature’s Thoughts Dies to coordinate with the Stampin’ Up! Positive Thoughts Stamp Set. Yay!!
Did you notice the Silver Butterfly? They are the perfect size to accent your cards. Or how about the fun pierced edge around the die cut rectangle? This edge was created using the Stampin’ Up! Nature’s Thoughts Dies. It was super easy!!!
Thank you for stopping by Brandy’s Cards. I hope you enjoyed my project today. Be sure to let me know if you need something or have questions. I’m always glad to help.
Happy Stamping!! Brandy

1. Cut a 4-1/4″ x 11″ piece of Whisper White Cardstock and fold it in half. This is your card base.
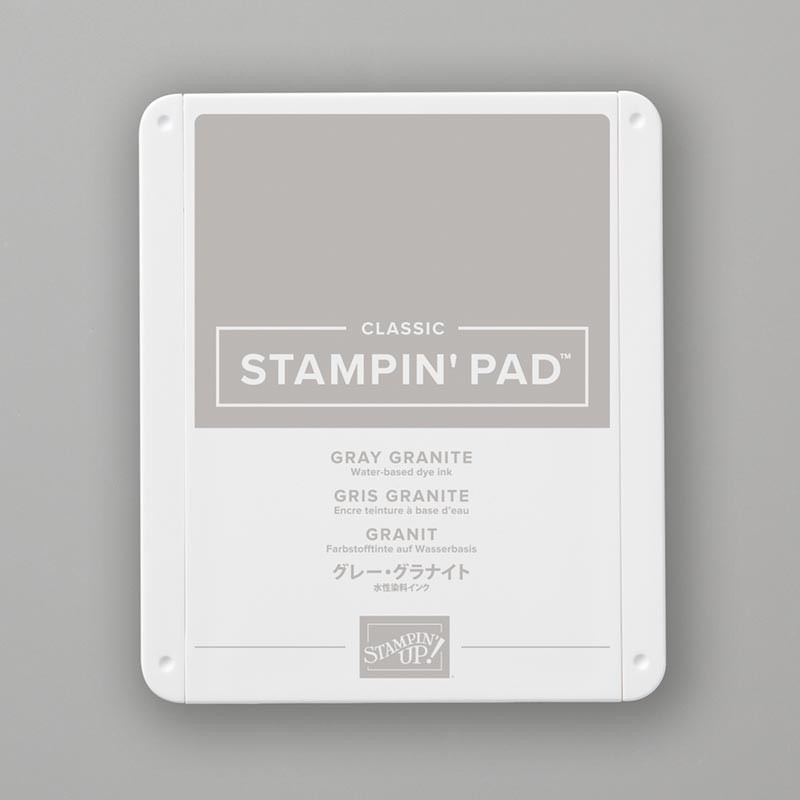
2. Cut a 3″ x 4-1/2″ piece of Gray Granite Cardstock. This piece will layer under your pierced rectangle.
3. Using the Stampin’ Up! Nature’s Thoughts Dies to die cut a Whisper White decorative rectangle.
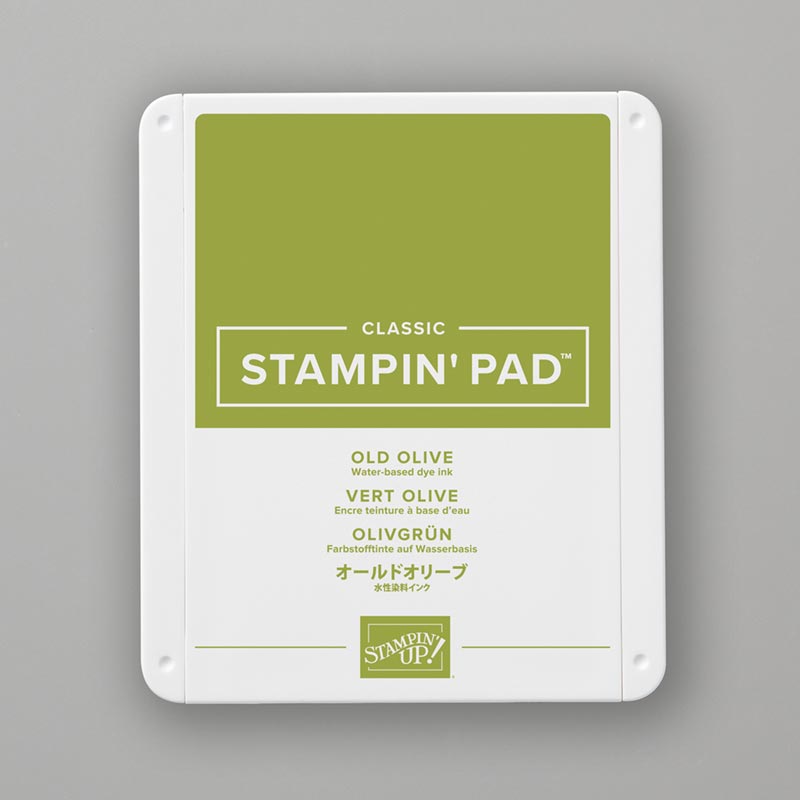
4. Stamp your leaves on the rectangle using Old Olive Ink.
Tip: To achieve a variation in color you can ink up the image and stamp off or you can continue stamping the image and let it get lighter and lighter until you’ve achieved the desired look.
5. Stamp your spots in Gray Granite.
Tip: I used a stamp from the Stampin’ Up! Waterfront Stamp Set to stamp my spots.
6. Once you’ve stamped your leaves and spots add a few stampin dimensionals behind the rectangle. Center and adhere it to the top of your Gray Granite Cardstock.
7. Add liquid adhesive behind the Gray Granite Cardstock. Center and adhere this layered piece to the top of your card.
8. Stamp your leaf in Old Olive Ink on scrap paper. Use the Stampin’ Up! Nature’s Thoughts Dies to die cut the leave.
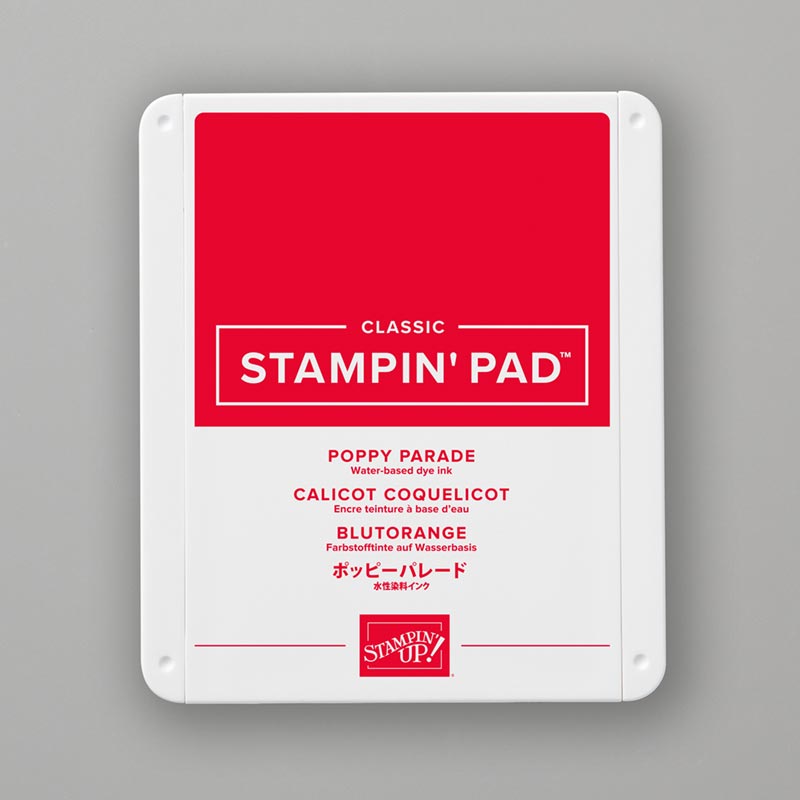
9. Stamp the flower in Poppy Parade Ink on scrap paper and die cut it out.
Tip: Be sure to die cut a couple of the small sprigs in Whisper White as well as Silver Foil. You’ll also want to die cut (2) Silver Foil Butterflies.
10. Add a few dimensionals behind your leaf and add the small sprigs. Then adhere your leave and sprigs to the top of your card.
11. Next add a couple dimensionals near the leaf stem and adhere your flower.
12. Cut a 7/8″ piece of Whisper White Cardstock. This piece is for your sentiment.
13. Stamp your sentiment in Gray Granite Ink.
14. Next create a banner on one end of your sentiment strip.
15. Cut a piece of Whisper White Solid Bakers Twine and staple it to the end of you banner and tie a decorative bow. Don’t forget to trim any access.
16. Adhere your banner to the top of your card using stampin dimensionals.
17. Finish your card by adhering your Silver Foil Butterflies.
Tip: If you’d like to an a Jewel Rhinestone or embellishment you can certainly do so in the center of your butterflies.
18. Don’t forget to finish your stationary by stamping this beautiful flower and leaves on your envelope.
#151490
#153586

#132178


Great video..really liked the vibrant color in the flower. Appreciated you showing us how to stamp off to get a lighter color leaves.thanks for all the work and time you put in.
Love the card! My positive thoughts stamp set and dies are arriving today. I can’t wait to play with them.
Brandy, what a great video/tutorial. I cannot believe how you can make everything look so easy.. I appreciate your style of “teaching” you cover all the bases and get me anxious to jump right into card making.
Brandy, I love this card!! I really needed it tonight. It was so soft a peaceful after a crazy busy day. It made my heart happy ? And the verse was perfect! You made my day!