

 Hey Stampers,
Thank you all for the kind notes and comments on this weeks projects. You made my day and really warmed my heart. Thank You!!!
I love creating and I love sharing these creations with all of you. My hope is that I have inspired you to have some fun, get creating and share your talents and gifts with others. Remember you can’t beat Snail – Mail!!
I promised I would post the directions for the remainder of the projects. Here they are… I hope you enjoy them! Stay Warm Friends! Brandy
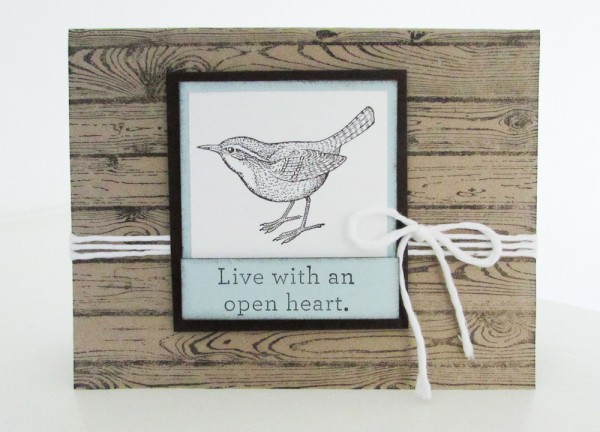
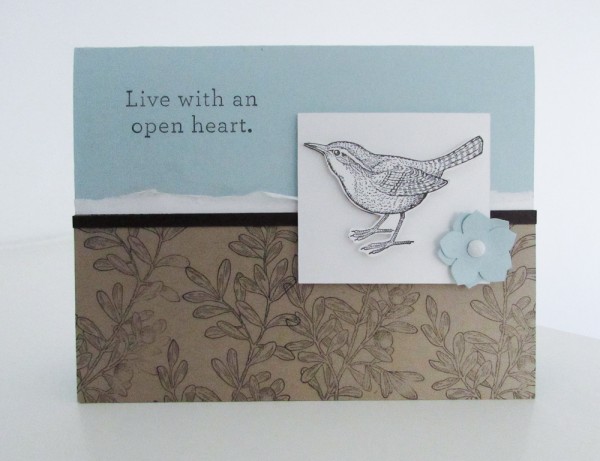
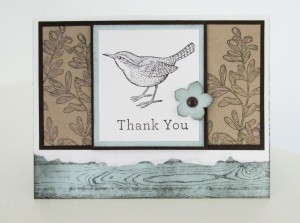
Base
1. Cut a 5-1/2″ x 8-1/2″ piece of Crumb Cake Cardstock. Score you Crumb Cake Cardstock at 4-1/4″ and fold in half. This is your base.
2. Cut a 5-1/4″ x 4″ piece of Whisper White Cardstock to layer inside of your card.
3. Use Whisper White Bakers Twine to wrap your base three times and tie a decorative bow. Trim of the ends of your bow if its too long. This will keep you card neat and tidy.
Bird
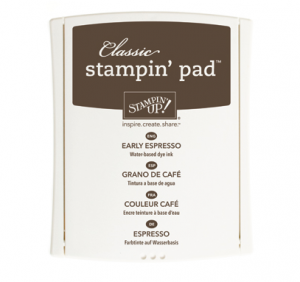
1. Cut a 2-3/4″ x 3″ piece of Early Espresso Cardstock and set aside.
2. Cut a 2-1/2″ x 2-3/4″ piece of Soft Sky Cardstock and set aside.
Tip: Use a Stampin’ Sponge and an Early Espresso Stamp Pad to flick the edges of the Soft Sky Cardstock! Do this with your 2-1/2″ x 3/4″ piece of Soft Sky for your greeting too!
3. Cut a 2-1/4″ x 2-1/2″ piece of Whisper White Cardstock. This piece is for your image.
4. A 2-1/2″ x 3/4″ piece of Soft Sky Cardstock. This piece is for your greeting/sentiment!
5. Using an Early Espresso Stamp Pad to stamp your greeting/sentiment and bird.
Tip: Stamp your images before adhering it to your Soft Sky Cardstock. This way, if you make a mistake you can flip the Whisper White Cardstock over and try again!
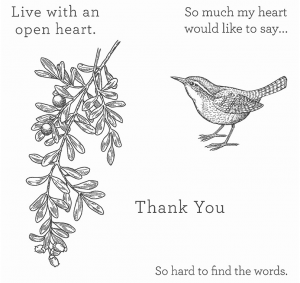
Tip: You can use any sentiment or greeting you would like. The bird and greeting I used are from the Stampin’ Up! An Open Heart Stamp Set!
5. After stamping your image, use adhesive, center and glue your image on top of the Soft Sky Cardstock.
6. Add the Soft Sky on top of the Early Espresso.
7. Next, use pop dots to add the Early Espresso piece with your image on the top of your card.
Tip: I used the Stampin’ Up! stampin’ dimensionals because they add a nice lift on top of your card.
8. I also used Stampin’ Dimensionals for the Greeting/Sentiment so that it would have a bit of lift!
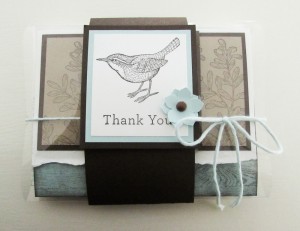
Design #2
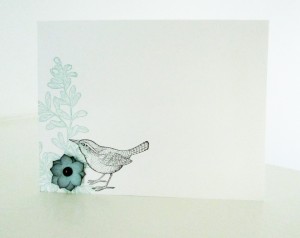
Bird
1. Cut a 3″ x 3-1/4″ piece of Soft Sky Cardstock and set aside.
2. Cut a 2-1/2″ x 2-3/4″ piece of Soft Sky Cardstock and set aside.
3. Cut a 2-1/4″ x 2-1/2″ piece of Whisper White Cardstock. This piece is for your image.
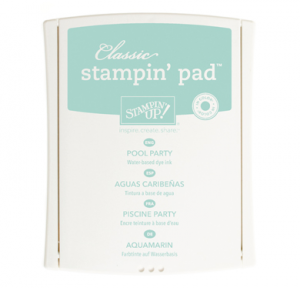
4. Using a Pool Party Ink Pad to stamp your image at the bottom of the 2-1/4″ x 2-1/2″ piece of Whisper White Cardstock.
5. Using an Early Espresso Ink pad to stamp your bird.
6. Using adhesive to add your image on top of your small piece of Pool Party Cardstock.
Tip: I used Stampin’ Dimensionals to pop this layer up off the 3″ x 3-1/4″ piece of Soft Sky. It gave it a nice lift!
7. Use adhesive to adhere your largest Pool Party layer on your card.
8. I used Whisper White Scrap paper to fit the greeting or sentiment that I chose. You can do the same at home and cut your Whisper White Cardstock to size to fit your greeting!
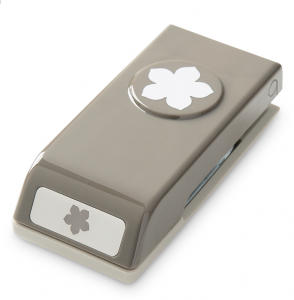
9. Let’s embellish! I used the Petite Petals Punch and punched out to Petite Petals and layered them together. I used a Stampin’ Up! Whisper White Candy Dot for the center.
Base
1. Cut a 5-1/2″ x 8-1/2″ piece of Whisper White Cardstock. Score you Crumb Cake Cardstock at 4-1/4″ and fold in half. This is your base.
2. Using a Pool Party Ink Pad and your image to randomly stamp around your base.
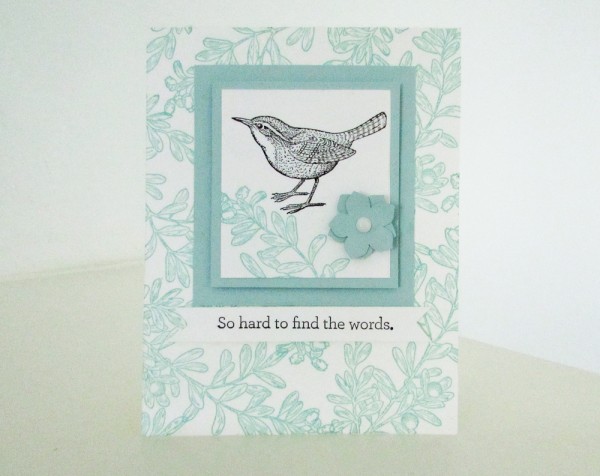
Design #3
1. Cut a 5-1/2″ x 8-1/2″ piece of Soft Sky Cardstock. Score you Soft Sky Cardstock at 4-1/4″ and fold in half. This is your base.
2. Cut a 5-1/2″ x 2/1-4″ piece of Crumb Cake Cardstock.
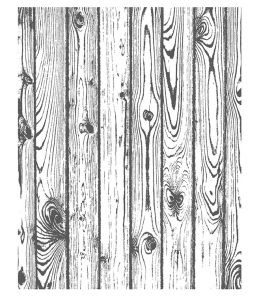
3. Using an Early Espresso Stamp Pad to stamp your image on the Crumb Cake Cardstock.
4. Tear a scrap piece of Whisper White Cardstock and adhere that under you Crumb Cake Cardstock.
5. Next cut a 5-1/2″ x 1/8″ piece of Early Espresso Cardstock to layer on the top of your Crumb Cake and on top of your Whisper White piece. This hides the edge and gives the card a more finished look.
6. Adhere the layered Crumb Cake Cardstock on top of your Soft Sky Cardstock.
7. Stamp your sentiment in Early Espresso.
Bird
1. Cut a 2-1/4″ x 2″ piece of Whisper White Cardstock.
2. Stamp your image in Early Espresso. To add lift I stamped this bird on a separate piece of scrap paper and cut it out. I used stampin’ dimensionals to pop him up.
3. Let’s embellish! I used the Petite Petals Punch and punched out to Petite Petals and layered them together. I used a Stampin’ Up! Whisper White Candy Dot for the center.

Video Tutorial – Click Here!
Video Tutorial – Click Here!
View Packaging Directions – Click Here!
Bind Your Catalogs

Visit Staples or Office Max to bind your catalogs!
Products Used

Catalog Request Form
If you are interested in receiving a Stampin’ Up catalog, please fill out the request form below. If you currently have a demonstrator, please ask your current demonstrator for the catalog, because I do have to pay for the catalogs and for shipping. However, if you don’t have a demonstrator and are interested in purchasing Stampin' Up products, I’d love the opportunity to share Stampin’ Up with you, answer any questions and earn your business.


